I used the Dotted Petals Press Plate, Thinking of You stamp, die and stencils, Print Shop: Modern Botanicals stamp, dies and stencils, Nested Elongated Oval Blanket Stitch, Joyful Day stamp and dies

To start use the Dotted Petals Press Plate
onto the letter press system, apply clear embossing ink. Prepare the
watercolor card stock with anti-static powder tool, run this through the
die cutting machine. Sprinkle white embossing powder onto the panel and
heat set.

Dab Waterfall ink to a clear sheet, spritz with water and apply over
the panel. Continue with Paradise and Summer Shower inks. Add some
flicks of Bubble Gum ink and let this dry.
Die cut the frame
using the Nested Elongated Oval Blanket Stitch dies from white card
stock, die cut a piece of vellum using the second largest die. Adhere
behind the frame using 3D foam.

Stamp the images twice and sentiment from the Thinking of You stamp using Detail Black ink.
Add color to the images using inks through the stencils (Grassy Knoll, Paradise, Candy Violet, Lavender, Atlantis, Apricot)
Die-cut all the images and the sentiment using the coordinating dies.
Adhere one of the images behind the vellum, and adhere the vellum frame to the panel. Adhere the panel to a white cardbase.

Adhere the images using 3D foam. Using the sentiment die, die-cut one more piece from the Essential Glitter cardstock: Candy Violet. Adhere this behind the sentiment slightly offset. And add this to the card.
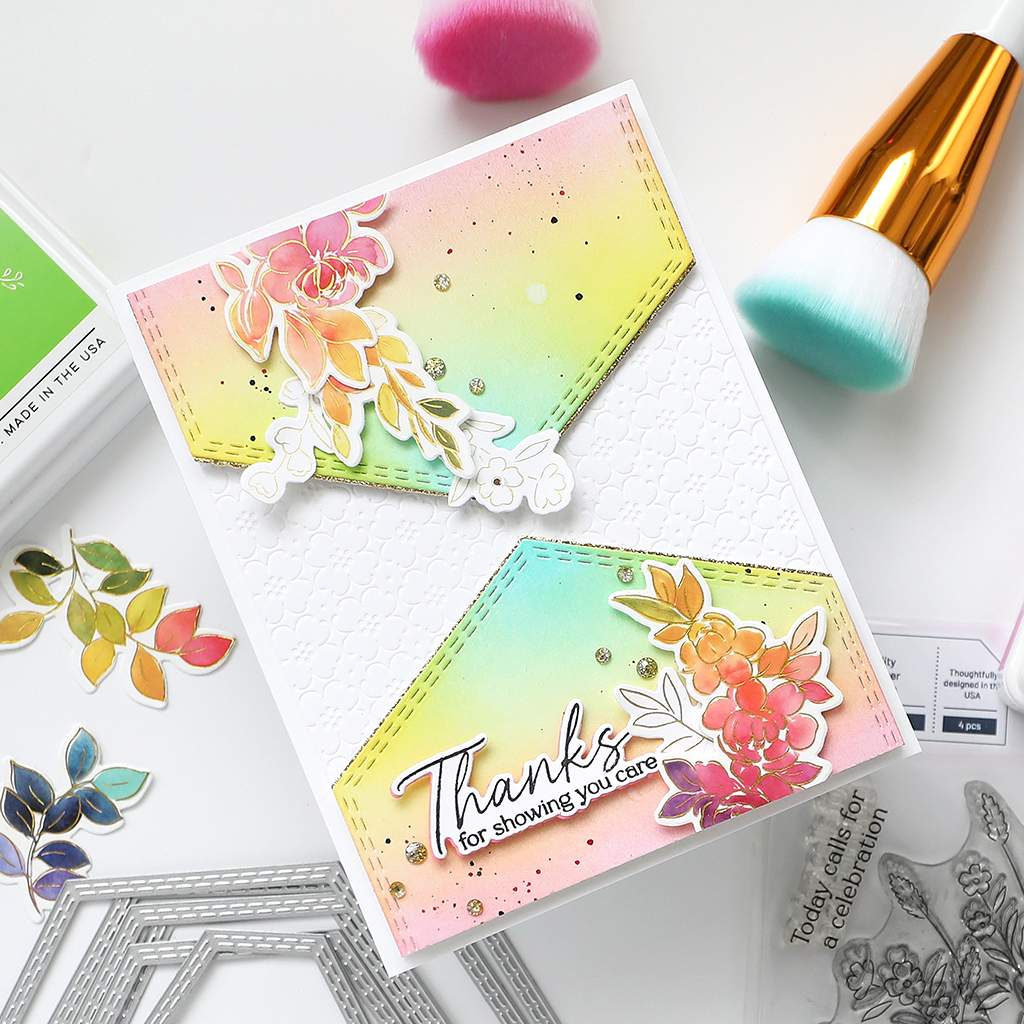
For
the next card, use the same process as above for the technique panel.
Next, instead of vellum I used white card stock oval die-cut and sponged
Waterfall ink lightly.

I use the images from the Print Shop Modern Botanicals. Next, I added
inks through the stencils (Waterfall, Seaside, Atlantis, Grassy Knoll,
Olive, Raspberry Bliss, Apricot, Sweet Mustard, Clementine) Die cut
using the coordinating dies.
I then, heat embossed the leaves
from the Joyful Day stamp set onto vellum using white embossing powder.
Die cut using the coordinating dies and adhere behind the floral cluster
for some texture.

I matted the sentiment using black cardstock in a slight offset. Next adhere the Oval panel onto the card.

Hope you enjoyed this technique I hope you will give it a try, if you do, please share it on our social media and tag us.
Thank you for dropping by and have a nice day!